How To Make A Bottle Lamp DIY Tutorial
Here is a complete step by step process for creating your own bottle lamp.
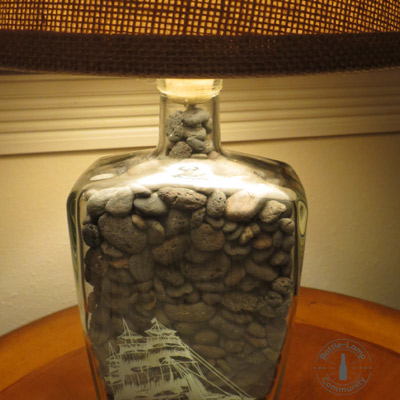
- Step One: Collect the items that you will need for the project – An empty glass container, A light bulb and a lamp shade, A lamp kit, A Glass drilling bit, A small rubber grommet, and filler for the bottle to hide the electrical cord (optional).
- Step Two: Get the tools that you will need to make the craft – A screw driver and a corded or cordless drill, a pair of heavy duty gloves and a pair of safety glasses.
- Step Three: Begin by finding the spot on your glass container that you want the cord to come out from.
- Step Four: Using the glass drill bit, slowly begin the drilling the glass. By drilling at a slow and steady speed you will prevent the glass from over heating which can cause your bottle to break.
- Step Five: Follow the instructions on the lamp kit to wire your bottle. Put the rubber grommet on your electrical cord before you run it through the hole. Once you have the bottle wired up, press the rubber grommet into place on the hole that you drilled. The grommet will hide the edges of your drilled hole and give the lamp a more finished look. With your grommet in place you can now add the filler. This part is optional but by adding a filler you will hide the electrical cord and give the lamp stability.
- Step Six: Place the lamp shade on and insert the light bulb.
Want to have the visual experience to help you with the bottle lamp making process?
Click on our how to video below:
Now that you’ve created your own bottle lamp you will want to share your project with the world.
Simply take a picture or two of your newly created masterpiece and submit it to the Bottle-Lamp website’s DIY Show Off page! It’s easy to be featured… complete a short form and hit SUBMIT. That’s it!
If you have any questions about the lamp making process or tips for drilling glass, be sure to leave us a comment below.
Share with your friends:
- Click to share on Facebook (Opens in new window)
- Click to share on Pinterest (Opens in new window)
- Click to share on Twitter (Opens in new window)
- Click to share on Reddit (Opens in new window)
- Click to email a link to a friend (Opens in new window)
- Click to print (Opens in new window)
